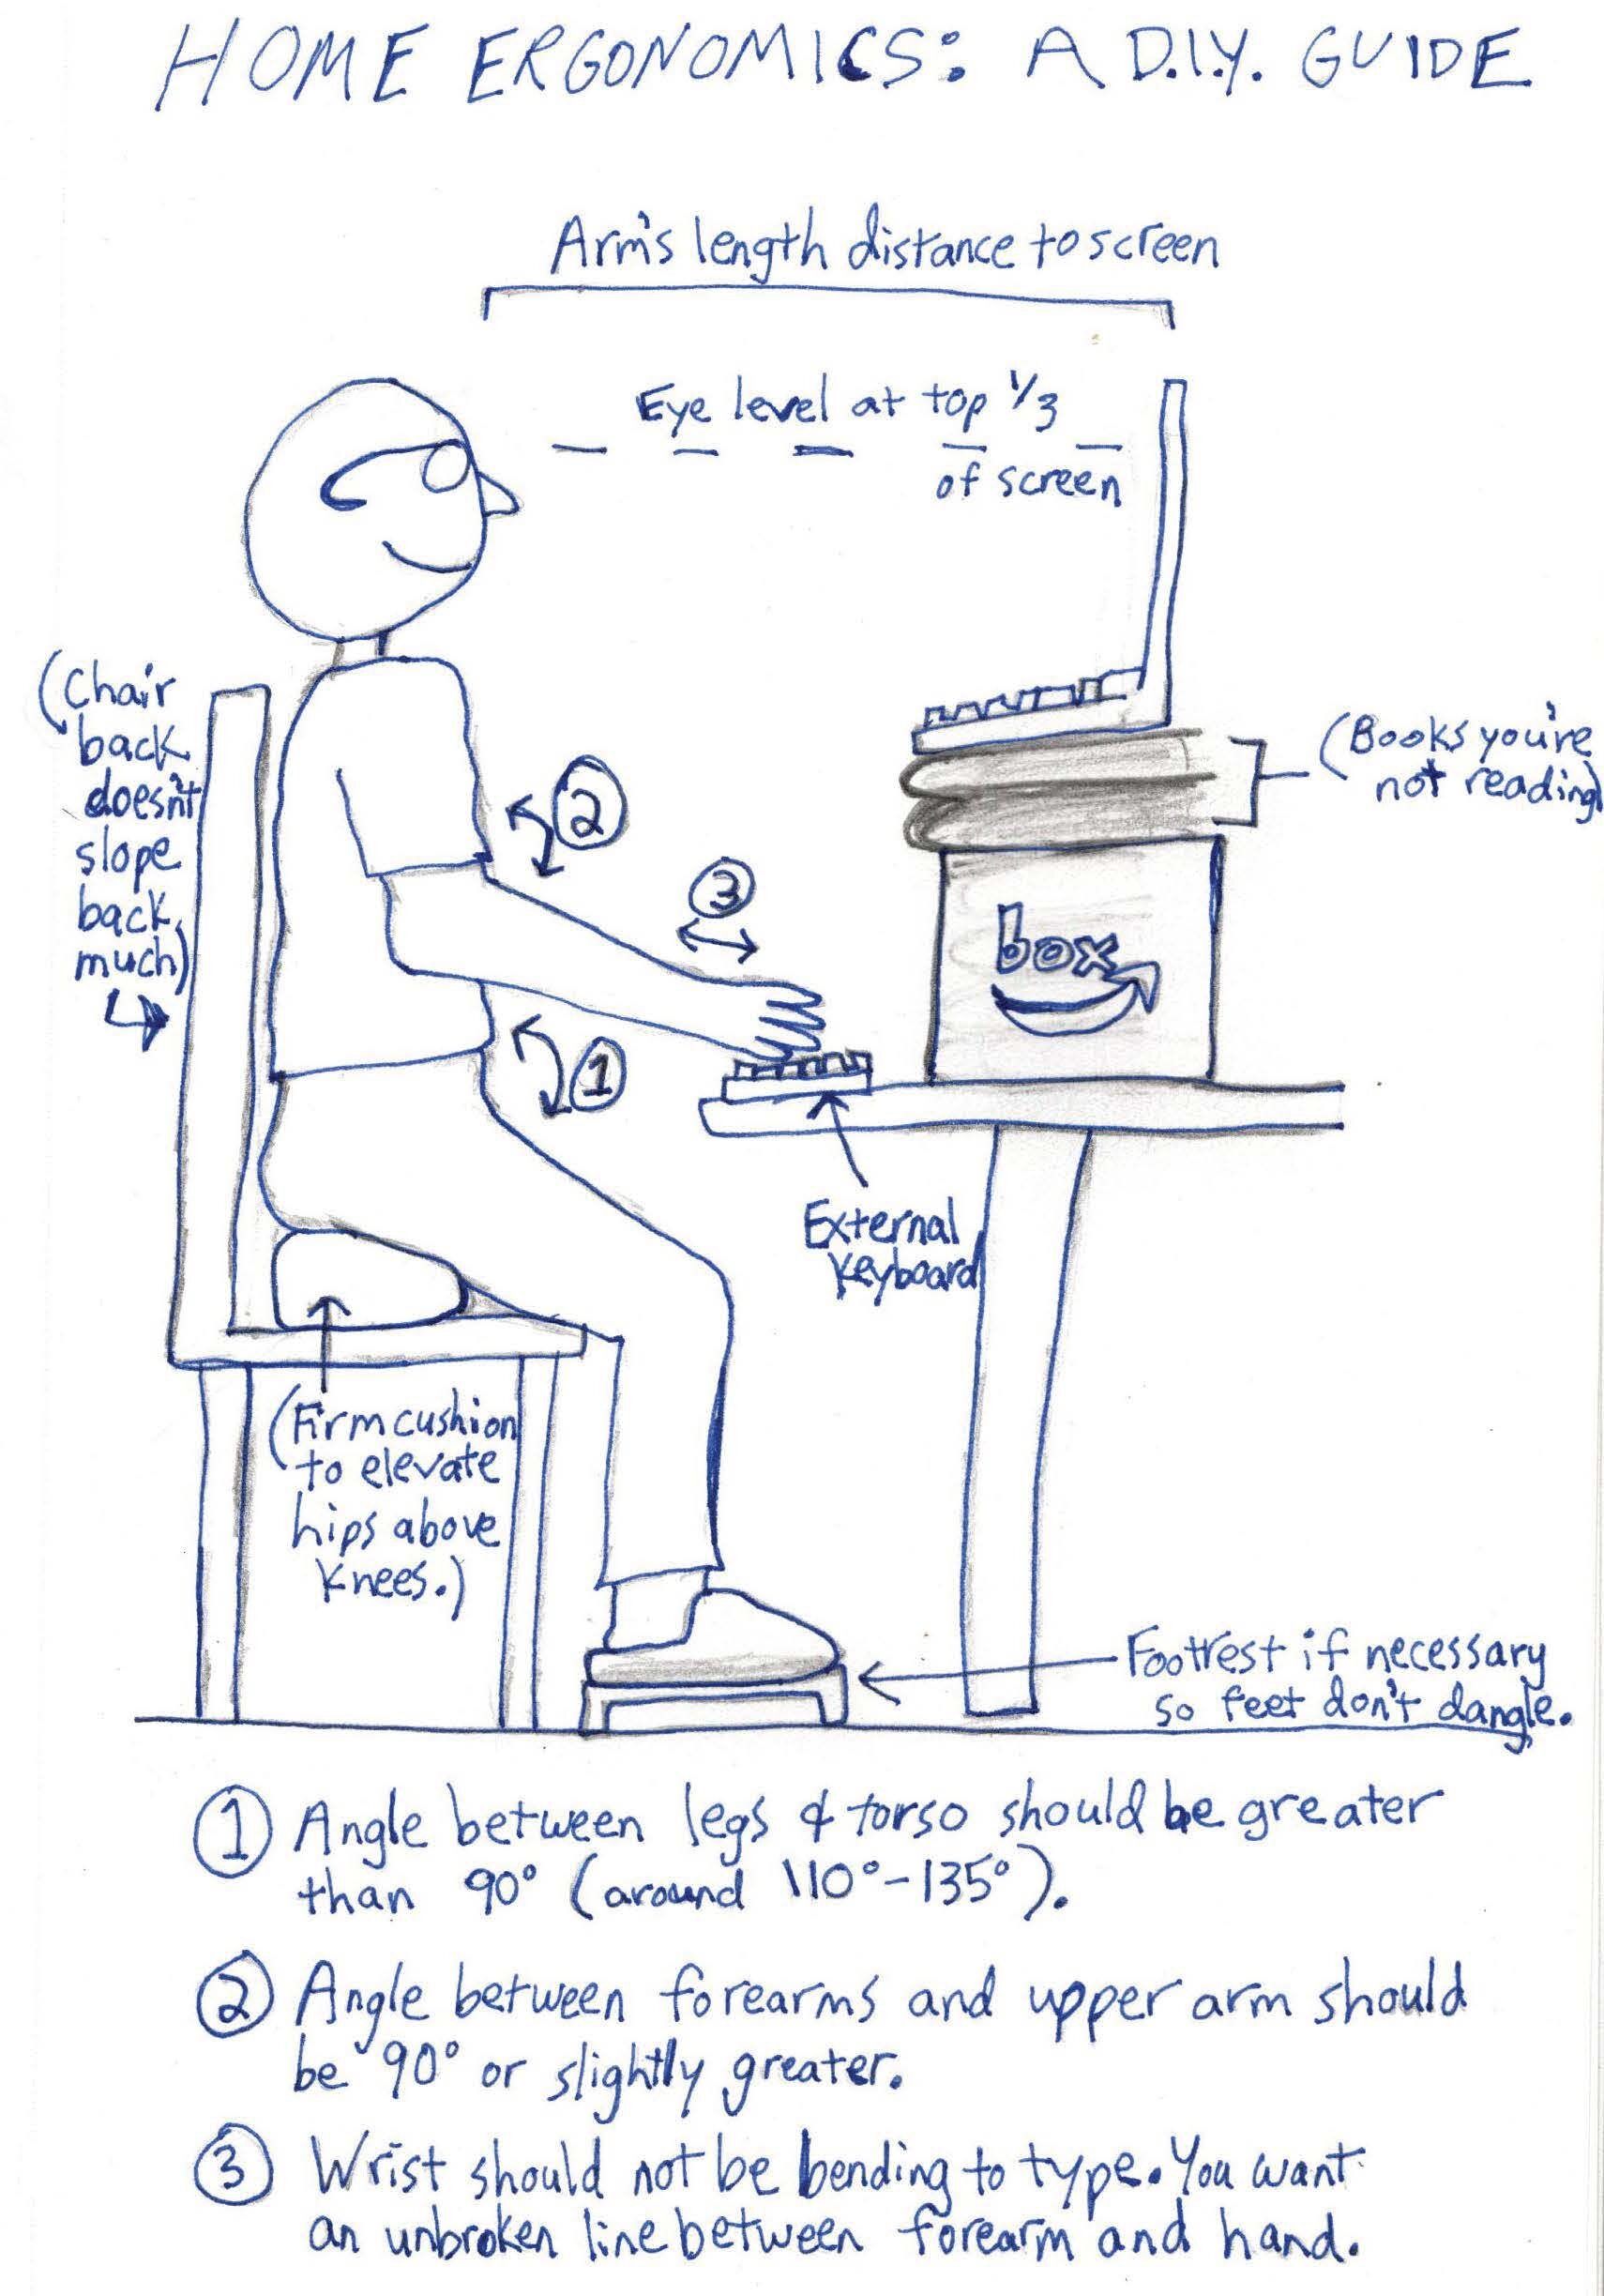
Home Ergonomics: A DIY Guide
How awkward is your work (at home) setup?
Many of us have had to suddenly create workstations right in the middle of our homes, conscripting kitchen counters, coffee tables and the like as our full-time office. I’m an Alexander Technique teacher (which means I work with posture and alignment) and I put together a short guide to making your DIY workspace more ergonomic and less of a musculoskeletal disaster. Most of these changes can be done easily and without purchasing anything, but will help you avoid extra tension, aches, or injury. An artist I am not, but attached is a one-page visual guide. I’m also offering short remote assessments for your individual workstation.
First off, start with what you’re sitting on.
CHAIR
What you sit on (and how you sit) plays a major role in whether your setup is healthy. Use a firm sitting surface and a chair back that doesn’t encourage you to lean far back. A couch will almost always lead to a puddle-like posture.
Consider, as an experiment, raising your seat so that your hips are higher than your knees, which can be accomplished by placing a firm cushion under you (I link to two options on Amazon at the end). Most adults find it more comfortable and less stressful on their back and hips to increase the angle between their torso and upper legs beyond 90° (i.e. sit higher on a firm surface with your hips above your knees). For a quick and dirty solution, try placing a folded blanket, towel, or yoga mat under your rear to raise you up.
COMPUTER
Laptops are inherently unergonomic because either the screen is down too far below your head, compelling you to hunch, or if the screen is in the right position for your head then the keyboard is likely too high for your arms. However, there is an easy fix – purchase a relatively inexpensive external keyboard. Now, you can raise your laptop screen up to around eye level (your eyes should be looking at about the top one third of the screen) and position it an arm’s length away.
KEYBOARD
[Definitely consult the visual guide about this section) The two important angles related to your keyboard are the angle between your upper arm and your forearm (which should be 90° or slightly greater) and the angle of your wrist (there shouldn’t be much bend in your wrist – you want to see a relatively straight line from your forearm all the way to your knuckles).
Once you’ve elevated your seat, that will lessen the likelihood that your keyboard is too high. However, if you have neck, arm, or hand issues, it’s worth considering investing in what’s called a “negative tilt” keyboard tray. It does require installing the tray to the underside of your desk or work surface, but it lessens the strain on the wrists and hands.
MISCELLANY
· “Task” lighting – from lamps that focus on a specific area, for instance – has been shown to be more beneficial for workers’ health compared to harsh overhead lighting or, conversely, lighting that’s too dim. You can probably truck a lamp in from another part of your house and soften the overhead light in the rest of the room.
· It makes a significant psychological impact to work on a clean, organized surface. And if you want to add a plant or some inspiring pictures, you’ll likely feel even better. With these small gestures, claim your small space as distinct from the maelstrom of your 24/7 kids-at-home house.
Feel free to forward this guide to anyone who might benefit. And if you’d like, I can take a look at your individual setup and, with a few photos and a twenty-minute Zoom chat, make specific recommendations tailored to your physical needs for $35. Just email if interested.
Cushion recommendations:
1. The “Smile Cushion” – I recommend getting it stuffed with buckwheat rather than kapok.
2. “Buckwheat Crescent Cushion” – This cushion is a little shorter than the Smile Cushion, so it’s recommended if you don’t need much additional height.
In health,
Dan
